Want to know which throttle body upgrade can take your 3.0T to 530bhp+?
Not sure how to reset the throttle body adaptation without VCDS?
Whichever it is, I've got you covered, keep reading to learn more!

This post may contain affiliate links. Please read my disclosure for more info.
Contents
- 1.0 - Audi 3.0T Throttle Body Location
- 1.1 - Audi 3.0T Throttle Body Part Number and Price
- 1.2 - Audi 3.0T Throttle Body Size
- 1.3 - Audi 3.0T Bigger Throttle Body Upgrade
- 2.0 - Audi 3.0T Throttle Body Problems and Symptoms
- 3.0 - How to Remove the Audi S5 3.0T Throttle Body
- 4.0 - How to Clean the Audi 3.0T Throttle Body
- 5.0 - How to Reset the Audi 3.0T Throttle Body Adaptation
If you find this article useful, I'd really appreciate it if you could help me spread the word by sharing it on social media or your favourite forum, thanks!
1.0 - Audi 3.0T Throttle Body Location
The throttle body (a.k.a throttle valve control module) on the Audi 3.0T, or 3.0L V6 TFSI if you prefer, is located at the rear right hand side of the supercharger module (your left, if you're stood looking at the engine bay from the front).
It's very accessible, you only need remove the corregated air intake hose and you have access to the throttle body.

1.1 - Audi 3.0T Throttle Body Part Number and Price
The part number for the throttle body in my 2010 Audi S5 Sportback (CAKA engine code) is 06E133062G, and is manufactured by Siemens VDO.

Should you need a replacement, you can grab one from Autodoc UK. I've used Autodoc a number of times now, I ordered my replacement MAP sensors from them, and the service has been fantastic, they've always got a discount code available too!
Please double check the part number on your specific car before ordering a replacement though, just in case.
1.2 - Audi 3.0T Throttle Body Size
The stock throttle body on the Audi 3.0T engine has a bore diameter of 68mm.
Bizarrely, the throttle body has a smaller bore diameter than the supercharger port it marries up to.
This is likely an example of Audi raiding the parts bin for a throttle body that's close enough, to save tooling up a unique one.
1.3 - Audi 3.0T Bigger Throttle Body Upgrade
The stock throttle body on the Audi 3.0T is fine at stock power levels.
If you've added dual pulleys however, you'll want to replace the restrictive stock throttle body to unleash the 3.0T's full potential, 530bhp+!
There are only two companies out there offering larger throttle body kits (that I could find, let me know in the comments if you know of other options):
Note: I'm not affiliated with either of the above companies, nor have I used either of the two systems, so please do your own research before making a purchase.
Definitely the most talked about throttle body upgrade is the APR Ultracharger system.

It consists of a larger 80mm throttle body, a silky smooth carbon fibre intake tube and a smooth cast supercharger inlet, that APR claims completely removes the throttle body as an airflow restriction.

I have to say it looks the absolute business, APR if you're reading this I will happily test one of these out for you :P

2.0 - Audi 3.0T Throttle Body Problems and Symptoms
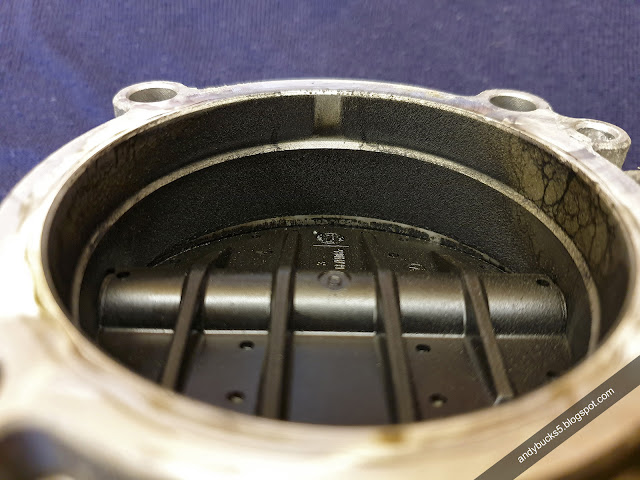
When grime builds up on a throttle body, it can inhibit the butterfly valve's full range of motion. You can see my throttle body below wasn't fully closing.

The grime can come from a number of sources; hot exhaust gases rising through the engine when it's turned off engine, unburnt fuel vapours and I've even heard of overly oiled aftermarket air filters (K and N, ITG etc) causing oil build up on the throttle body.
The boffins at Audi have accounted for this (to an extent) by allowing the throttle body to adapt (hence having to reset adaptations after cleaning).
There is only a certain amount of adjustment the ECU is programmed to allow though, once exceeded, you're going to get the dreaded check engine light and a fault code will be stored.
If you have a dirty, faulty or failing throttle body, you are likely to have experienced (or will soon experience) one or more of the following symptoms.
- Lumpy, High or Low Revving Idle
- Car Lacks Power When Accelerating
- Car Accelerates Itself
- Engine Management Light (EML) Illuminated and/or Fault Code Stored
2.1 - VAG Fault Codes Related to a Faulty Throttle Body
- P006800 - MAP/MAF - Throttle Position Correlation
- P156800 - Throttle valve control unit mechanical malfunction
Note: P006800 could be triggered by a faulty MAP sensor, check out my full guide to cleaning and replacing your MAP sensor for more info!
3.0 - How to Remove the Audi S5 3.0T Throttle Body
Tools required:
- Flat head screw driver
- Torx T30
- Paper towel
If you don't have a set of Torx bits or drivers, I constantly bang on about this DeWALT set, really handy, robust quality you'd expect from the DeWALT brand. I've used it pretty much daily for my full house renovation too.

Step 1 - Remove the Rear Engine Cover
Simply pull off the rear engine cover (the one with the 4 Audi rings on it) to expose the throttle body.
Step 2 - Remove the Intake Hose
You may notice the slight continuity error here, in the first step I've got a Forge FMINDS5 intake hose, but in this step I'm showing the stock intake hose.I figured most people would still have a stock intake hose, and if not, they have already swapped it out for an upgraded one, so should know how to remove it.
First, loosen the hose clamp at the air box end of the intake hose. Either use a socket or a flat head screwdriver, whichever you find easiest.

Release both clips securing the intake hose to the air box (one is just out of shot behind the intake hose clamp bolt).

Next, unclip both tubes from the intake hose.

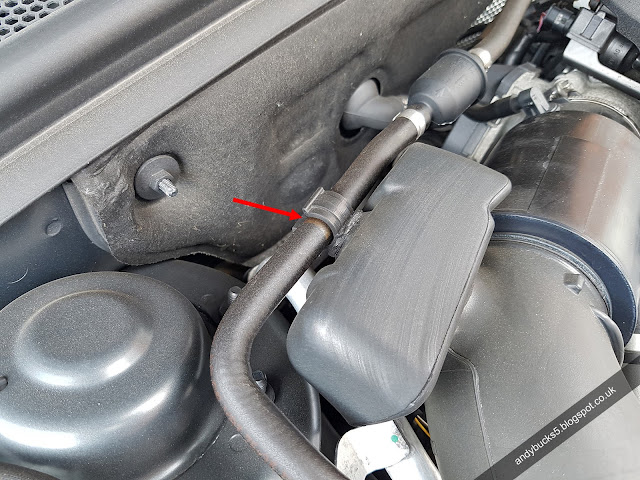
Then, supporting the plastic elbow, pull the small tube free of the intake hose.

Finally, loosen the hose clamp at the throttle body end of the intake hose.

You should now be able to remove the intake hose from the engine bay.
Step 3 - Remove the Electrical Connector
With the intake hose out of the way, the electrical connector to the throttle body will become much easier to access.
To remove the connector, squeeze the clip where the red arrow is, then pull the connector off towards the front of the car.


Step 4 - Remove the Throttle Body Bolts
Remove the 4x Torx T30 bolts securing the throttle body to the supercharger module.
Your throttle body should now be free of the supercharger module and can be removed.

Step 5 - Plug the Hole
It's good practice to plug any hole if it's going to be exposed for any length of time.The last thing you want is for something to fall into the supercharger, or worse you drop something in there knowing you've screwed up.
Grab a couple of sheets of thick paper towel, or a clean rag, and just plug the hole until you're ready to refit the throttle body.

Note: The picture above is from when I replaced the thermostat and water pump, so don't worry about all the labels and amount of parts missing from the engine bay.
4.0 - How to Clean the Audi 3.0T Throttle Body
Cleaning the throttle body is all to often overlooked, in my opinion though, it really should be part of your yearly service.
From start to finish it'll only take you 30 mins tops, here's how to do it.
Tools required:
- Carb Cleaner
- Electrical Contact Cleaner
- Scouring pad
- Stubby Screwdriver
- Paper towel or microfibre
Step 1 - Wedge the Butterfly Valve Open
Rotate the throttle body's butterfly valve fully open, then slide your stubby screwdriver in to hold it open. Be careful though, don't wedge something in that causes the valve to over rotate!
Step 2 - Spray the Throttle Body with Carb Cleaner
Spray the butterfly valve and inner faces of the throttle body with carb cleaner and let it sit for 30 seconds.Make sure you're wearing a mask in a well ventilated area, carb cleaner is nasty stuff.
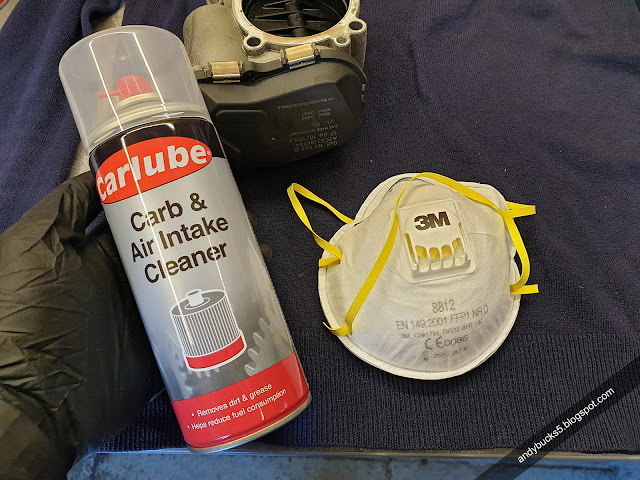
Step 3 - Gently Scrub Away the Grime
Using the scouring pad, gently scrub away the grime. It comes off pretty easily I found, whether that's testament to the quality of the carb cleaner or it's just not that difficult to clean I'm not sure.
You'll want to swap the stubby screwdriver to the other side of the valve to ensure a thorough clean all round, and don't forget to clean the edge of the valve too.
I started off using a cheap toothbrush, but I think the carb cleaner ate the plastic as the head snapped off almost instantly...


Step 4 - Dry Throttle Body Inner
Once you're satisfied the throttle body valve and inner walls are clean, dry them off with some thick paper towel.Here's the before and after shots of cleaning mine.

Step 5 - Spray Connector with Electrical Contact Cleaner
Spray the inside of the connector with electrical contact cleaner.This is a bit belt and braces, but whilst it's off the car you might as well.

Step 6 - Leave Throttle Body to Fully Dry
Do NOT refit the throttle body until all the electrical contact cleaner and carb cleaner has fully dried. The last thing you want to do is cause a short by rushing to reinstall.You could use an airline or a tin of compressed air to aid the drying process if you wished.

Once the throttle body is dry though, you're ready to refit and reset the throttle body adaptation (explained in section 5.0).
Step 7 - Clean Your Throttle Body MAP Sensor
This is an optional step, however, whilst you're in the area, already have a lot of the parts out the way and you're waiting for the throttle body to dry off, it'd be good preventative maintanence to clean your throttle body MAP sensor.I was amazed how dirty it gets, you can see it poking it's head out when the throttle body is removed.
Check out my full guide to cleaning your MAP sensor to find out how.


5.0 - How to Reset the Audi 3.0T Throttle Body Adaptation
Once you've finished cleaning your throttle body, you'll need to reset the adaptations (sometimes referred to as alignment).
For this, you're going to need either of the following;
- Ross-Tech VCDS (VAG-COM)
- This option is a lot more expensive and aimed more towards a power user, someone that knows what they're doing and wants to do long coding
- OBDEleven
Step 1 - Plug in Your Diagnostic of Choice
As I don't have a Ross-Tech VCDS, I'll be using OBDEleven for this tutorial. I assume the functions you have to run are very similar though.Make sure your car is completely back together, the throttle body must be installed and connected. Seems obvious, but best to double check.
Plug in your bluetooth OBDEleven receiver.
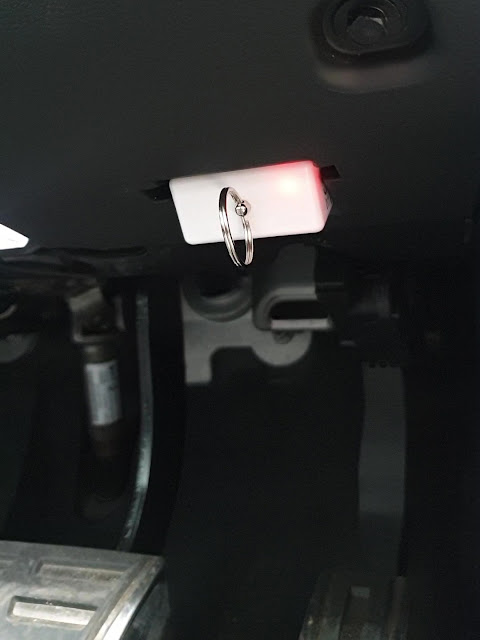
Step 2 - Turn the Ignition On
Push your key in, or if you're fancy and have keyless entry, press the start button.Do not start the engine though.
Connect your phone to your OBDEleven receiver.

Step 3 - Navigate to Engine Control Module 1
In the OBDEleven app, tap the blue button with three white horizontal lines in the middle,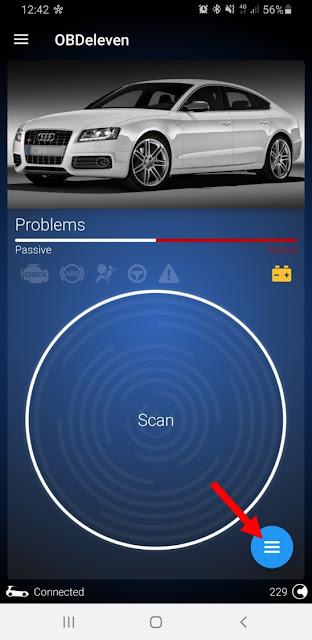
Then tap on Engine Control Module 1

Which should give you the menu below.

Step 4 - Load the Throttle Adaptation Test
Tap on 'Basic settings' and search for 'Test of throttle valve adaptation' and tap to load it
Step 5 - Run the Throttle Adaptation Test
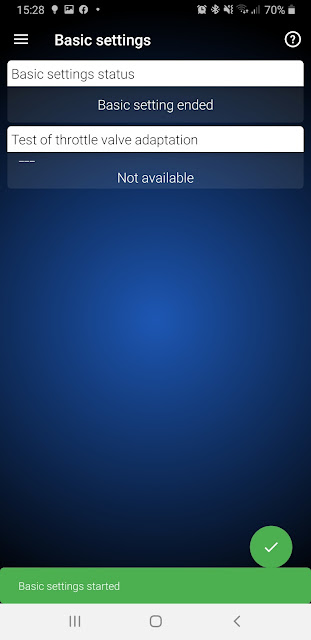
Again, the adaptation should be performed with the engine off, ignition on.To run the test, tap and hold the green tick

It'll only take a second to run, a green bar will show up at the bottom saying 'Basic setting started', then promptly the 'Basic setting status' field will change to say 'Basic setting ended'. All done!
Conclusion
Hopefully you now know what problems you might experience with your 3.0T throttle body, how to clean it and how to reset the throttle body adaptations. If you still have some unanswered questions put them in the comments below!
I really hope you enjoyed this article, if you did, I'd really appreciate it if you'd share it on social media or your favourite forum, it'd really help me out.
Be sure to Like, Subscribe and Follow me on your favourite social media platforms at the following links: Facebook, Instagram and YouTube, search andybuck123.
Stay tuned for plenty more content to come!

7 Comments
Nice DIY quide. Everything is clear. What about the seal ring , must be replaced? Imean the seal at 26/35 page. Thank you in advance.
ReplyDeleteHi Chris, thanks for the comment.
DeleteApologies but I'm not quite sure which seal you're referring to, there weren't any on my throttle body?
The only one in my write up is on the MAP sensor, the little green one, if that's it then no I didn't replace mine, but if you were being belt and braces I don't see the harm in doing it :)
Cheers,
Andy.
Hi Andy.
ReplyDeleteSorry for the confuse. I mean the seal at the pic below:
https://1.bp.blogspot.com/-6BxaE8cbBxs/Xw7wPt3NiKI/AAAAAAAARo8/NJBqE3OiDzIB2vd5ksmrv4_6TXfND-VNACLcBGAsYHQ/s640/Audi_S5_B8_3.0T_V6_TFSI_CAKA_Throttle_Body_Removed_MAP_Sensor_Visible.jpg
Regards
Chris
Hi Chris,
DeleteAh! My bad, I totally forgot the 'spacer' between the throttle body and the supercharger has o-ring seals each side.
No I didn't replace mine when I cleaned my throttle body. I think I just gave it a quick clean and added the smallest smear of oil just to lubricate it again.
If you wanted to replace them, the part number is 06E 145 272 C.
Hope this helps!
Andy.
Hi Andy,
ReplyDeleteThank you for the quick response.
Great I'm thinking keep the old seal in position too.
Have you any idea about the P049100, P049200 fault codes? I've got these codes on my Touareg hybrid 2011 which have the same audis 3.0T V6 supercharged engine as S4. As I can see the air pump works fine the hoses are ok and the solenoid valves are in working condition. I hear-read about carboncleaning with hydrogen thrue intake hose . In some way it cleans the engine. What you thinking about?
Thank for the support.
Chris
Do you know if the adaptation is the same for a C7 S6? I would typically just look at my OBDeleven but my car is on a lift as I'm swamping turbos, an oil/air separator, and wastegate.
ReplyDeleteHi Matt,
DeleteI don't know for sure but I think this is a fairly generic adaptation reset to do, so I would imagine the option will be worded either exactly the same or very similar.
Hope all the repair work goes well dude!
Cheers,
Andy.
Post a Comment
Let me know what you think by leaving a comment below.